Monday, March 13, 2017

Spring Iris

I have this tin planter I needed to make a Spring arrangement in. I have an idea that I want to add a nest with eggs but what kind of flowers? I couldn't find flowers to go with the look of the flowers on the front of the tin planter, so I decided to make my own. I looked through pictures of real flowers and found a yellow Iris. I draw out a pattern on paper and then run it through my Scan-N-Cut so I could save and cut more when needed. Pulled out my new Distress Crayons that I had not tried out yet. Love the way they work like watercolors.

Using a stylist I worked the petals into shape and added leaves. I love creating realistic things from paper.


Here's the finished arrangement. Thanks for peeking in.


 The more I looked at it I thought it really needed 3 flowers so here it is now truly finished.

Happy Spring,
Laurie Moore

There's a great challenge go on over at "Simon Say Stamps Monday Challenge" check it out! http://www.simonsaysstampblog.com/mondaychallenge/
The designers there have made beautiful handmade flowers!

Wednesday, March 1, 2017

Captured Fairies

Hi My Friends,
Here to share with you my enchanting Fairy jars. I made and sold some of these last year and really enjoyed the way they came out and today I received an order for 6 more. It's always nice when people remember something you make and want more of it.

 I start with a jar and cork lid, mod podge and tissue paper. Then I used a combination of sprays inks that match the flowers I will be adding. Oh the mix media yumminess! Just a touch of Glass Glitter on the top and bottom and you have the base to start adding flowers and twine at the top. 


Time for the fairy. Chipboard die-cut Fairies, embossing dabber, Melt Art Ultra Thick Embossing Enamel and your heat gun is all it takes to make the enchanting creature to be placed inside your jar. Add a tea light and let the magic begin. 

Thank you for peeking in,
Please leave a comment if you stop by,
Hugs and magical dreams, 
Laurie Moore

Tuesday, February 21, 2017

A Manly card

Making cards for men for some reason seems to always challenge me. I want to add flowers and pretty things to my work and those are not always the items you should add to a "Manly" project. So when I saw Emma Williams latest creation ... Take The Scenic Route , it sparked my desire to go back to a style that I enjoy the most, "vintage rusty goodness" as I call it. I didn't have the same products that Emma use to create her background technique, so my canvas looks a bit different from hers but I like way it came out. Also my card base was a lot smaller then Emma's to start with which was a challenge as well. I needed a card the would fit the envelope I had (5"x7") and could be mailed off, so no extra layers of materials or popping items up.  
 To start on the canvas background, I took white paint, blue paint and water to create some what the same look as Emma's. Added the Distress Spray Stains splatters and a touch of black Gesso. Sorry for the lighting of this photo, totally forgot to turn on my flash. 

 I really liked the way she layered this canvas on to the card with different colors of card stock and adding string. Here's how mine looks. I added a couple of Distress Powders, vintage photo and broken china with embossing ink and heat set it to get the idea of rusty edges. 


Thank you Emma Williams for you inspiration 
and Thank you my friends for stopping by.

Hugs,
Laurie Moore

Sunday, February 19, 2017

Dad and Me

Hi my friends, It's been awhile hasn't it. 

 Here's a look at a canvas that I made as a gift for my sweet Dad's Birthday. 
I was playing around with colors and textures for a background on this
 12" x 12"canvas. I try to use products that I have on hand to create with. Gesso, paints, Distress sprays stains, chalk paint, crackle medium, and some of my favorite masks I begin layering. 

First with paints I covered the canvas in random spots. These colors will peek through the crackle. I found that using flat paints often times crackle better. 
 Next I added the crackle medium and let it dry to the tacky stage before adding the chalk paint on top. Love the way chalk paint crackles!!
 To tone it down just a bit more after the crackle layers and chalk paint dries, I add a soft layer of Gesso. It also adds a little more texture. 
Now to add more color, Distress Spray Stain in Tea dye and Peacock Feathers. 
 I grabbed a couple masks and Gesso I add that yummy texture. Also a few pieces of tissue tape were added. Black circles place on using the cap from the distress stain dipped in the black paint adds a touch of contrast. Only need to add pictures, a title and of course flowers. Project just don't look finished to me unless I add flowers. 

 Finished the canvas and now ready to give to my Dad for his Birthday.
Thank you for stopping by.
Hugs and happy crafting,
Laurie Moore

I'm entering this canvas in the challenge on the blog..... 
Come take a peek! Thanks Laurie

Sunday, April 10, 2016

Wire Basket Wonder


This fun little wire basket arrangement was created from a silver wire basket that came in the April 2016 kit of month from

Here's a picture of the silver basket after I used Rusty Paper and the acrylic paint "opal magic violet gold" from Prima.
Thanks for peeking in.


Visit my store for Rusty Paper and other products.....

Laurie Moore

Wednesday, April 6, 2016

Baby Blessings!

Today I want to share with you a gift I made for my wonderful friend Becky who is having a baby girl soon. Her hubby and she have chosen a beautiful name for this sweet new life, Avaya.

I started with a 10 in x 8 in canvas, added spray stains and splatters for a soft back ground. With lace, flowers, flat back pearls, shimmer tiny hearts and a fine sprinkle of pink Art Sugars from Prima all over, the canvas started coming alive. Now look inside the arrangement of flowers and you will see a tiny little angle peeking out.
 I added a small Prima resin frame I pop dotted up so Becky could add Avaya's pictures in it and of course her name adorns the canvas.
I found a frame that the canvas fit in but the oak finish just wasn't the look I was going for so I painted and crackle it to match the tiny frame inside.


I wish Becky and her family joy with their new arrival. Babies are such sweet blessings and Avaya will be a wonderful and much loved addition to their family.

Love and hugs,
Laurie Moore

Monday, March 28, 2016

Old Memories

I found this fun little wooden sewing machine in a secondhand store. What to do what to do!! 

I know, I think I'll gesso it, spray it with a few of my favorite Distress Spray Stains. Add a few flowers, bobbins and a frame with a picture of my Great Aunt from 1930. 


 This is what I did with it!

I love added these kinds of home decor items to my home. 
Please leave a comment if you were inspired but this creation.

Hugs, 
Laurie Moore

Monday, March 21, 2016

WINNER! of the Spring Theme Blog Hop!!!

Thank you to all who join us! I had 18 comments minus the 2 duplicate comments so with Random. org I have a WINNER is number 4 on list!


Congratulations to Lydia Guijt!! You are my winner for the Spring Theme Blog hop. Lydia please email me your address so I may send out your prize.. mooreatfromtheheart@yahoo.com


#4 Lydia Guijt said...
Both projects are absolutely gorgeous. Love the step by step tutes. You're so talented!


Lydia Guijt said...  Both projects are absolutely gorgeous. Love the step by step tutes. You're so talentedMarch 19, 2016 at 7:39 AMThank you so much to all of those who Hopped over and joined us for the 4G's Spring Themed Blog Hop. If you're not a member yet of the 4G's, Girls, Giggles, Glitter and Glue on facebook click on this link and come join this fun group of ladies.... https://www.facebook.com/groups/872610696088060/

Saturday, March 19, 2016

4G's Spring Theme Blog Hop

The Girls, Giggles, Glitter and Glue Facebook group is having a Spring Theme Blog Hop! The 4G's are hoping you'll join us in visiting this event. You'll also have a chance to win prizes as well. So "Hop" on over and see what they have created for you.

TO BE ELIGIBLE TO WIN A PRIZE, YOU MUST:
***Complete the hop - visit and subscribe to all blogs/youtubes and comment on each project.
***Winners will be announced Monday, March 21 on each page you visited.

Here's the line up:

Saturday, March 19 ----

Amanda Rhodes: http://salnclts76.blogspot.com/
Kim Norman https://www.youtube.com/channel/UCBAz0kJjwL69GY-_hZaFhpw
Christy Lepine:  https://youtu.be/3UE8NPiSH9A
Tracy Sagriff:  http://mygrandmasteacups.blogspot.com/2016/03/
Laurie Moore: http://mooreartfromtheheart.blogspot.com/2016/03/4gs-spring-theme-blog-hop.html

Sunday, March 20 ----

Michele Quam: www.Chelmariescreativecorner.blogspot.com
Germaine Fryc: https://www.youtube.com/watch?v=iJ6yqJaYP58
Latanya Townsend-Poelinitz: https://www.youtube.com/watch?v=MWoACkQNYWw
Paula Driver: http://scrapyourworld1.blogspot.com/

************************************************************

Now here's my two projects to share with you. 
Making something to give as a gift or a home decor piece that helps 
"Feed the Birds" 
can be fun and easy.

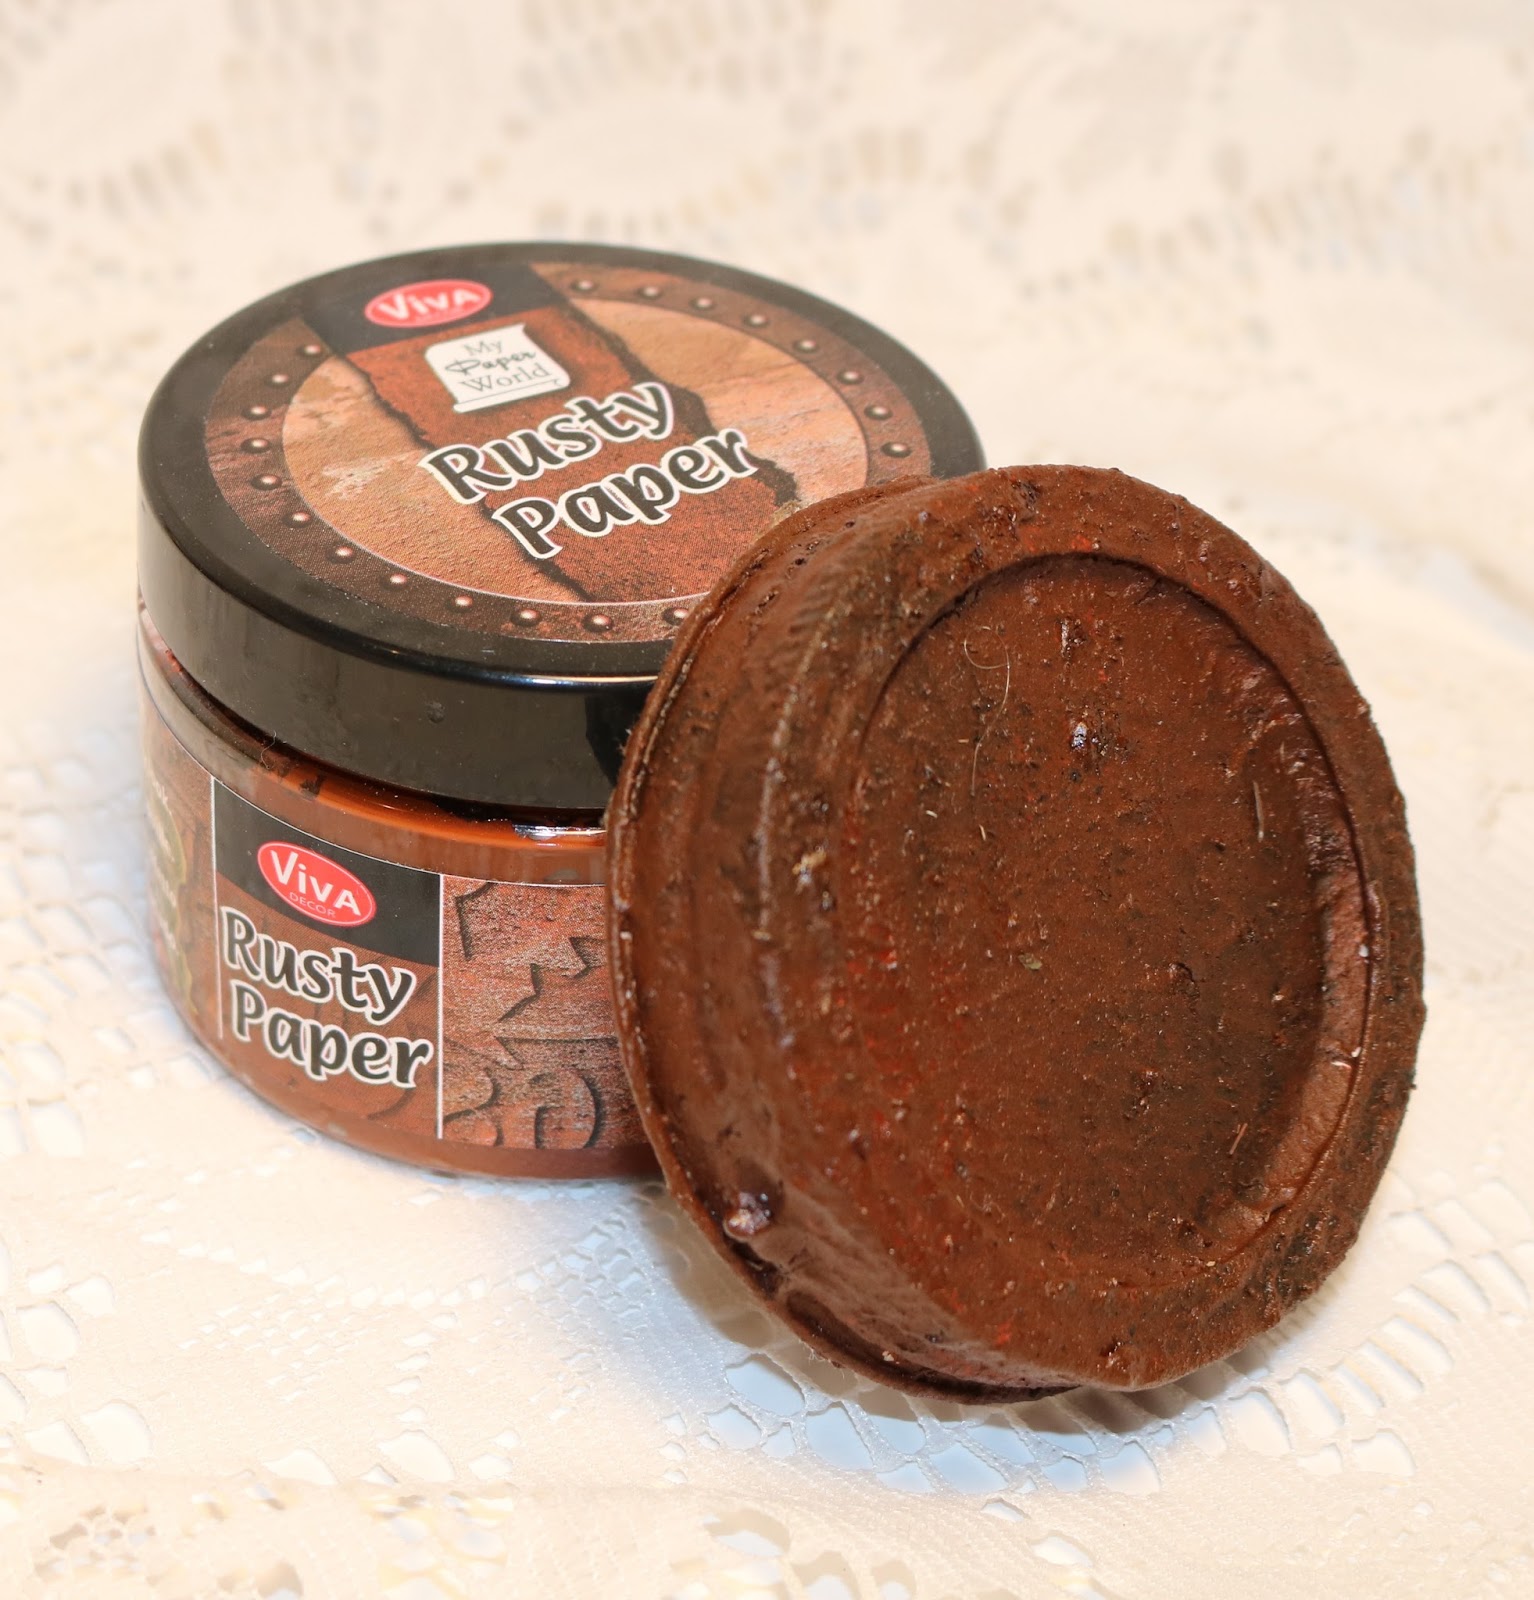
Now let's rust the lid and make it smell Yummy!
Here's what you'll need.....
This product makes it easy to make something look like it's rusty. 
Take 1 Tblsp. of Rusty Paper in a small bowl and mix in 1 tsp. of instant coffee and 1/2 tsp. of cinnamon. Glue your lid to the ring first and then paint with the rusty mixture. Let dry.
Here's a few more items you will need to complete you project. 
I glued twine ribbon around the jar and added this cute butterfly to a burlap flower on the side.
I stamped and layered the butterfly using Prima's  Marketing-Stamp N Add Stamp and Metal Embellishment Set . For the body, I embossed it using RANGER-Tim Holtz Distress Embossing Powder in Vintage Photo. Then I took take a soft gold wire to create the antenna. 
Now glue a nest to the lid. Add a bird, flowers, twigs and leaves for a nature look. 
Fill your jar with bird seed and enjoy Spring by "Feeding the Birds"

*************************************************************
Project number two.
Spring Canvas!
Start with Canvas turned over to use the back of it. 
This will create your frame. 


Now to add a little mix media to the frame with a mask (Feathers) and Gesso. I also did a little splatter paint drops all over. For one more layer of texture use crackle paint.    


 I carry these sweet Copper Micro Beads Art Ingredients by Prima in my store. They add such wonderful shinny texture to your creations. 
 Glue moss, a nest and a few feathers to the inside corner of your frame.
 Cut out small banner shaped pieces from printed burlap and add stick-on letters then glue on a string. A piece of cardboard stripped down and Gessoed makes a great background for a garden card.
 Add twigs and string for 3-d elements. 

 Now glue a few eggs and mommy bird to the nest. Add your banner and you have created a 
"Spring Canvas"
 I thought it needed just one more surprise element and this rusty old key was just what it needed.

Thanks for Hopping over to visit me. I'd love to read your comments about these two projects. 

Happy Spring to All
Hugs, Laurie 

I'm so happy you took a peek all the way through my post because you get a sneak peek at the prize I will be giving to one luck winner from my page of subscribers who left a comment .